

02-07 Subaru WRX / STi Brake Line Relocation Install Guides
Subaru WRX / STi inBay with OEMC (CB-WRX-OEMC)
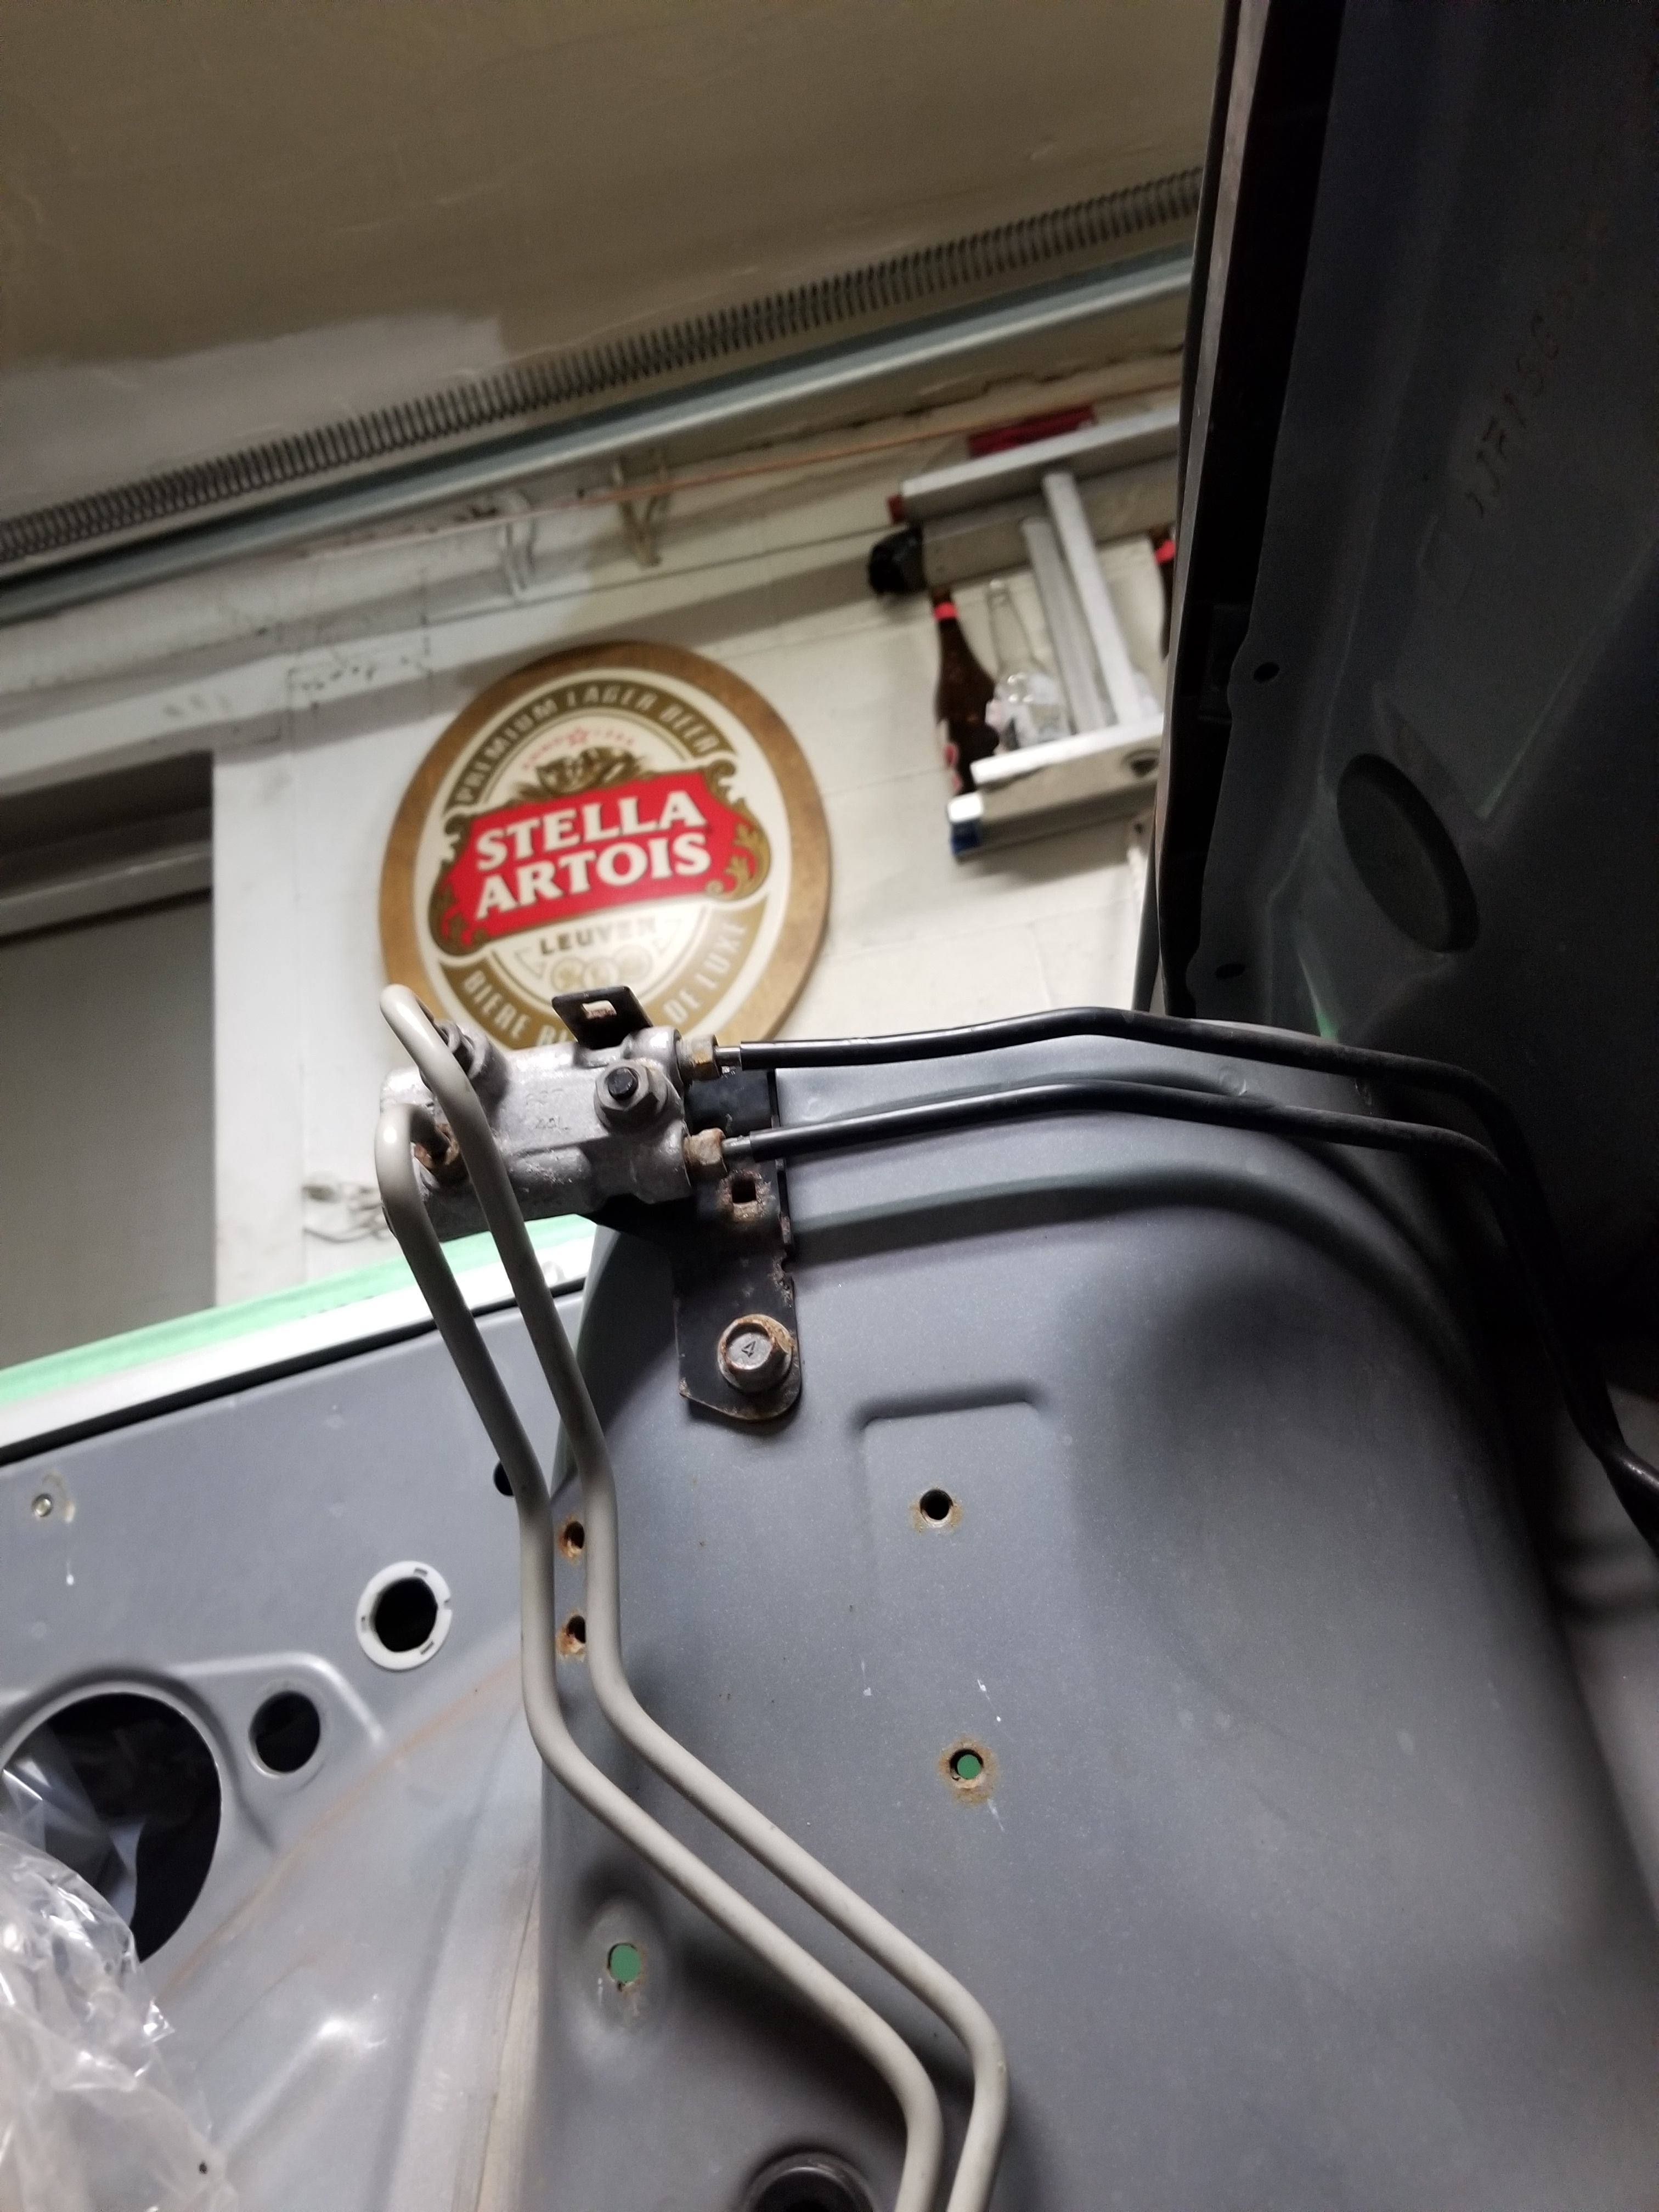
1. We always recommend starting the installation by mounting the Bias Valve supplied with the kit. This will be mounted using one of the studs/bolts that secures the Brake Master Cylinder to the Brake Booster. We typically will use the stud/bolt closest to the passenger side of the vehicle or underneath the Brake Master Cylinder depending on the application.
2. The first thing you will want to do is secure the Double Sided Banjo Hole Adapter to the front port on the Brake Master Cylinder using the supplied 10mm Banjo Bolt & Crush Washers.
3. The first line to be connected will be the front driver side line. This line will be roughly 20" long with 90˚ and Straight Fittings. The 3AN 90 fitting will be connected to the driver side of the Double Banjo Hole Adapter that we connected to the Brake Master Cylinder. The other end of that line will be routed through the hole to the side of the Brake Master Cylinder that leads to the driver fenderwell and will connect to that fenderwell brake line.
4. The next line will be the front passenger side line. This will be the longest line in the kit and will be the only one with a Chase Bays label on it. The female 3an end of the line will connect to the forward side of the Double Banjo Hole Adapter on the Brake Master Cylinder. The other end of the line will be routed across the firewall and will go through the hole leading to the passenger fenderwell where it will connect to the passenger fenderwell brake line.
5. Now for the rear brakes, the shorter of the two lines left with the Banjo Adapter Fitting at one end and 90˚ Fitting at the other end will be attached to the rear port on the Brake Master Cylinder using the 10mm Banjo Bolt & Crush Washers supplied with the kit. The 90˚ Female 3AN Fitting will then be attached to the Bias Valve "in" fitting.
6. The last line left will connect to the Bias Valve "out" fitting using the Straight Female 3AN Fitting. The other end of that line will then be connected to the OE rear hardlines using our Female M10 F Fitting and the 45˚ of the line. This line will route along the back of the firewall to the existing rear hardlines. On some cars, these attach to the passenger strut tower, but can be relocated lower for a more tucked look.
7. Now that everything is connected, you will need to bleed the air out of the braking system. To do this, we recommend using the "old school" 2 person method with one person pumping the brake pedal and the other bleeding air at the caliper. We have found that vacuum or pressure bleeders give sub par results and generally just add to the time this will take to complete. You will want to start at the caliper furthest away from the Brake Master Cylinder (passenger rear) and work your way to the caliper closest to the Brake Master Cylinder (driver front).
Subaru WRX / STi with Single Piston Brake Booster Delete (CB-WRX-BBE)
1. We recommend having the ABS module (if applicable) removed and the Brake Booster Eliminator and Bias Valve installed before connecting the lines in this Brake Line Relocation. To install the BBE and Bias Valve, follow the steps below. If you already have these products installed, continue to step 2.
Brake Booster Eliminator Installation:
- Disconnect the brake lines at the master cylinder/abs module and remove from the engine bay.
- Install the BBE through the holes in the firewall where the OE Master Cylinder/Brake Booster was located and secure it using the 4x M8 nuts supplied with the BBE.
- Adjust the clevis on the BBE so that the pin can slide through it and the brake pedal without having to manipulate either to get the holes to line up.
- Tighten the 5/16 x 24 nut on the Master Cylinder rod against the clevis to keep it from moving.
Bench Bleeding:
- We recommend bench bleeding the BBE Master Cylinder prior to connecting the Bias Valve. This is easiest done by securing one of the brake lines in your Brake Line Relocation Kit to the 3AN banjo adapter on the Master Cylinder and putting the other end of the line in the Brake Reservoir.
- Fill up the reservoir with brake fluid and begin pumping the pedal, making sure that the free end of the Brake Line is completely submerged in brake fluid.
- Continue pumping the pedal for a few minutes until you can not see any bubbles coming out of the Brake Line in the reservoir. Once there are no more bubbles you're good to go!
Bias Valve Installation:
- Remove the nut securing the bottom of the BBE Master Cylinder to the mounting plate and slide the Bias Valve bracket over the stud so that it is hanging. Thread the nut back on the stud and tighten it to secure the Bias Valve.
- Using the Stainless Steel Hard Brake Line supplied with the Bias Valve, connect it from the 3AN Banjo Adapter on the BBE Master Cylinder to the "in" fitting on the Bias Valve.
2. The first line to be connected will be the shortest in the kit. It should be about 25" long with 90 degree and straight fittings at each end, it will also be the only line in the kit with a Chase Bays logo on it. The female 90 degree fitting will be connected to the driver side of the T Fitting on the Bias Valve. The CB Logo should be facing out or up. The other end of the line will then be routed through the hole in the driver side fenderwell and will connect to the fenderwell brake line.
3. The next 2 lines will be the same length lines in the kit, but this step requires the one with the male M10 end. The female fitting will be connected to the passenger side of the T Fitting on the Bias Valve. Route the other end of the line low on the firewall just above the transmission, through the hole in the passenger side fenderwell, and connect it to the passenger front fenderwell brake line.
4. Last will be the one with 2 straight 3AN female ends. It will be connected to the "out" fitting on the Bias Valve. The other end of that line will then be connected to the OE rear hardlines using our Female M10 F Fitting. This line will route along the back of the firewall to the existing rear hardlines. On some cars, these attach to the passenger strut tower, but can be relocated lower for a more tucked look.
Now that everything is connected you will need to bleed each caliper, we suggest doing this with the Bias Valve knob all the way out (to the left) to give the most flow to the rear calipers. We have gotten the best results by using the two person method having one person pumping the pedal and another bleeding air at the caliper. You will want to start at the caliper furthest away from the master cylinder (passenger rear) and work your way to the closest caliper (driver front).